
Introduction: DIY Walnut Floating Shelves
Looking for a stylish yet practical storage solution? Walnut floating shelves offer the perfect blend of elegance and functionality. These minimalist shelves not only enhance your décor with their rich, warm tones but also save space by eliminating bulky brackets. Discover how these shelves can elevate any room!
What are DIY Walnut Floating Shelves?
Walnut floating shelves are modern, minimalist shelves that “float” on the wall, held up by hidden brackets. Made from high-quality walnut, they add a sophisticated touch with their dark hues and beautiful grain. Perfect for displaying décor or organizing items, they combine both beauty and practicality.
Why DIY?
DIY walnut floating shelves let you customize size, design, and finish to suit your space perfectly. Not only do they save money, but building them yourself adds a personal touch to your home, ensuring both quality and uniqueness. It’s a fun and rewarding project with lasting results!
Benefits of Walnut Floating Shelves for Easy Storage
Looking for a storage solution that combines both beauty and function? Walnut floating shelves provide the perfect balance, offering reliable storage without cluttering your home. With their timeless aesthetic appeal, strength, and space-saving design, these shelves are a game-changer for anyone looking to elevate their home décor. Let’s explore the top benefits of incorporating walnut floating shelves into your home.
Aesthetic Appeal
Walnut floating shelves instantly elevate your home with their luxurious, rich tones and intricate grain patterns. Their natural beauty complements any room, from modern living areas to cozy bedrooms, providing a stylish focal point without overwhelming your space. These shelves are not just storage solutions; they are design statements that add a sophisticated touch to your home.
Durability and Strength
Choosing walnut means selecting a material that’s known for its remarkable strength and resilience. Walnut floating shelves are incredibly durable, capable of holding heavier items without bending or warping. This high-quality wood ensures that your shelves will not only retain their aesthetic appeal but also stay functional and reliable for years, making them a smart long-term investment.
Space-Saving Solution
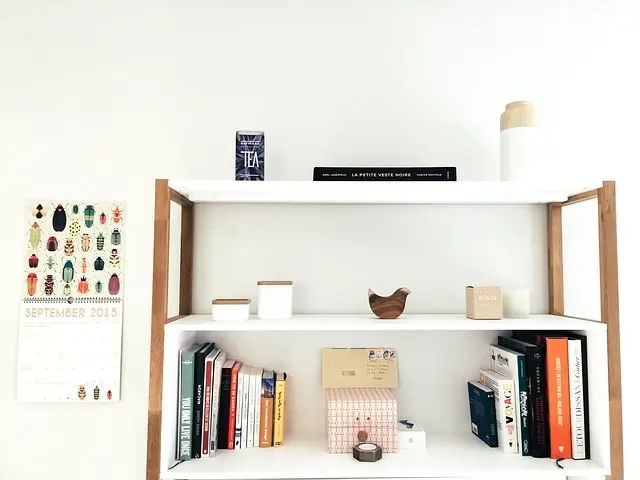
Walnut floating shelves offer an ideal storage solution, especially for small spaces. Their bracket-free, floating design creates an airy, open feel while still providing ample storage for books, décor, or kitchen essentials. Perfect for minimalist designs or smaller apartments, these shelves save precious floor space without compromising on style, blending practicality and elegance seamlessly.
Materials Needed for DIY Walnut Floating Shelves
Ready to craft your own floating shelves? Before you start, it’s essential to gather the right materials. With the right supplies, you can ensure your DIY project not only looks great but also lasts for years. Let’s go through the materials you’ll need to build walnut floating shelves that are both functional and beautiful.
Walnut Wood: The Heart of Your Floating Shelves
When it comes to DIY floating shelves, walnut wood is your go-to choice. Known for its durability and rich, warm tones, walnut adds a timeless beauty to any space. It’s strong enough to hold heavier items, making it ideal for floating shelf designs that are both practical and visually stunning. A high-quality walnut board ensures long-lasting, reliable results for your project.
Tools and Equipment: Get the Right Tools for a Smooth Build
To ensure precision and safety in your DIY walnut shelf project, you’ll need a few essential tools. A saw for cutting the wood, a drill for creating mounting holes, and a level to ensure your shelves are perfectly aligned are key. Having the right equipment on hand ensures smooth, professional-quality results, making your DIY journey easy and enjoyable.
Additional Supplies: Finishing Touches for a Professional Look
In addition to wood and tools, some finishing supplies will take your project to the next level. Wood glue, screws, and mounting brackets are necessary for stability and security. To protect the natural beauty of walnut, consider using a quality wood finish or stain to highlight the grain. These final touches help create a polished and durable shelf that’s ready to be displayed.
Step-by-Step Guide to Building DIY Walnut Floating Shelves
Building walnut floating shelves is a satisfying and rewarding project. By following these clear steps, you’ll have custom shelves that add both functionality and elegance to your space. Let’s break it down, step by step, to help you get started on your DIY journey!
Plan and Measure Your Space
Before you even pick up a tool, take time to plan and measure your space. Identify where you want the shelves to go and make sure you have ample space to accommodate the size of your walnut wood. Accurate measurements will ensure that your floating shelves fit perfectly and align properly when installed, saving you time and hassle during the project.
Cutting the Walnut Wood
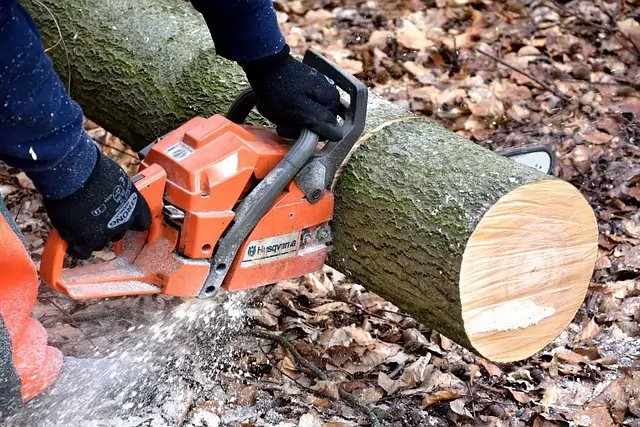
Now that you have your measurements, it’s time to cut the walnut wood to size. Use a saw to make precise cuts according to the dimensions you’ve planned. Keep your cuts straight and clean to avoid rough edges. If you’re unsure, take your time and measure twice before cutting to ensure each piece fits perfectly into your design.
Sanding and Finishing the Wood
Once your walnut wood is cut, the next step is sanding it down to create a smooth, even surface. Use fine-grit sandpaper to remove any rough edges and imperfections. After sanding, apply a wood finish to highlight the natural grain of the walnut. A wood stain or clear polyurethane finish will protect the surface and give it a beautiful shine, enhancing the wood’s rich tones.
Install Floating Shelf Brackets
The key to creating floating shelves is the installation of hidden brackets. Measure and mark where you want to place the brackets on the wall, ensuring they are level and spaced evenly. Install the brackets securely into the wall, making sure they are anchored properly to support the weight of the shelves. A level is essential here to guarantee that your shelves will float straight and balanced.
Mounting the Shelves
Once your brackets are in place, it’s time to mount your walnut shelves. Simply slide the shelves onto the brackets, ensuring they fit snugly and securely. Double-check that everything is level before securing them in place. With the shelves mounted, step back and admire your work—your custom walnut floating shelves are now ready to use!
Tips for Maximizing Storage with DIY Walnut Floating Shelves
Want to make the most of your DIY walnut floating shelves? By customizing the design and organizing your space effectively, you can maximize storage while maintaining a stylish and uncluttered look. Here are some expert tips to help you utilize every inch of your shelves efficiently.
Customize Shelf Depth and Width
One of the easiest ways to maximize storage is by customizing the depth and width of your shelves. Depending on the items you intend to store, you can adjust the size to fit larger books, decor, or kitchen essentials. A deeper shelf allows for bulkier items, while a narrower design works best for lightweight, decorative pieces. Customizing the shelf dimensions gives you the flexibility to create shelves that work for your specific needs.
Organizing Multiple Shelves
When installing multiple floating shelves, think about how to arrange them for both functionality and aesthetics. Group similar items together, such as books, plants, or art pieces, to maintain a clean, organized look. Consider creating “zones” on your shelves for different categories, which will make it easier to find things while also keeping everything tidy and in place. Properly organizing multiple shelves helps prevent clutter and makes better use of your storage space.
Space Considerations
While floating shelves are great for saving space, it’s important to consider the overall layout of the room. Install shelves where they won’t interfere with movement or create visual clutter. For small rooms, consider placing shelves higher up on the wall to free up floor space.
Ensure that the shelves complement the rest of your furniture and décor, so the space feels open and airy rather than crowded with storage. Thoughtful placement and design help maximize storage while keeping the room comfortable and stylish.
Ideas for Using Walnut Floating Shelves in Different Rooms
Walnut floating shelves are versatile and can effortlessly elevate the aesthetic and functionality of any room. Whether you’re looking to add a touch of sophistication to your living room or enhance the organization of your kitchen, walnut shelves provide the perfect solution. Let’s explore how to incorporate them into various rooms of your home.
Living Room
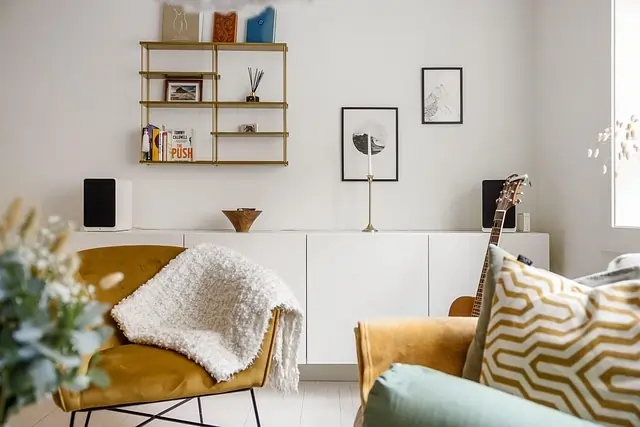
Imagine the warm, inviting ambiance of walnut shelves in your living room. Whether you’re showcasing books, art pieces, or your favorite plants, walnut floating shelves instantly add a refined, modern touch. Place them above a sofa or along an accent wall to create a statement without overwhelming the space. Their minimalist design ensures they blend seamlessly with any decor, from traditional to contemporary.
Kitchen
In the kitchen, walnut floating shelves combine beauty with practicality. Use them to store spices, cookbooks, or even display elegant dishware. Their open design makes it easy to access everyday items, keeping your kitchen organized while adding a dash of sophistication. Consider installing shelves near your cooking or prep area for quick and easy access to essentials while cooking.
Bathroom
Walnut floating shelves bring a touch of luxury to your bathroom while also providing a perfect place to store towels, toiletries, or decorative accents. Whether installed above the sink or in an unused corner, they help organize the space without taking up valuable floor area. These shelves allow you to display scented candles or plants, creating a calming, spa-like atmosphere.
Home Office
In a home office, walnut floating shelves offer the perfect blend of storage and style. Organize books, office supplies, or personal items in a way that keeps your workspace clutter-free. Their minimalist design ensures your office remains clean and professional, while the rich, warm tones of walnut add a sophisticated touch. Install them above your desk for easy access to your essentials and to maintain a tidy, inspiring environment.
Cost of DIY Walnut Floating Shelves: Budget-Friendly or Expensive?
One of the most important questions when considering a DIY project is the cost. How much will it really take to build walnut floating shelves? Will it be an affordable project, or will it stretch your budget? Let’s dive into the costs of making walnut floating shelves and weigh whether the investment is worth it.
Breakdown of Costs
- Walnut Wood: High-quality walnut can be expensive, typically ranging from $30 to $60 per board foot, depending on the thickness and grade of wood you choose.
- Tools and Equipment: If you already have the necessary tools like a saw, drill, and sandpaper, the costs will be minimal. If not, you might need to invest in tools, which can add up to $100 or more, depending on what you need.
- Finishing Supplies: Wood finish, stain, and polyurethane cost around $10 to $30. These materials are essential for protecting your shelves and giving them a polished look.
- Brackets: Floating shelf brackets typically cost between $10 and $30 each, depending on the design and strength required.
- Overall, the cost of a DIY walnut floating shelf project can range from $50 to $150 per shelf, depending on the size and materials you choose.
Is DIY Worth the Investment?
So, is building your own walnut floating shelves worth the investment? Absolutely! When you consider the price of purchasing ready-made floating shelves, which can cost upwards of $200 or more per shelf, DIY is a far more budget-friendly option. Plus, building your own shelves gives you complete control over the design, size, and finish, so they will be a perfect match for your space. Not only will you save money, but you’ll also enjoy the satisfaction of crafting something beautiful and unique with your own hands.
Common Mistakes to Avoid While Making Walnut Floating Shelves
While DIY walnut floating shelves are a rewarding project, they can quickly turn frustrating if you make common mistakes. From inaccurate measurements to skipping essential steps, errors can affect both the look and functionality of your shelves. Here are the top mistakes to avoid to ensure your shelves turn out beautifully and safely.
Inaccurate Measurements
One of the most common mistakes when building floating shelves is failing to measure accurately. A small miscalculation can result in uneven shelves or a poor fit against the wall. Always double-check your measurements before cutting the wood. Measure twice, cut once—this old adage holds true when it comes to woodworking. Use a level to ensure that your shelves are perfectly aligned, as even slight tilts can be noticeable.
Not Using the Right Brackets
Another major mistake is using the wrong type of brackets. Floating shelves rely on strong, secure brackets to stay in place, and not all brackets are created equal. Make sure to choose sturdy, heavy-duty brackets designed for the weight and size of your walnut shelves. Opting for cheap or lightweight brackets can lead to instability or even shelf failure. Always choose brackets that are specifically made for floating shelves, ensuring they can hold the weight of the walnut wood and any items you plan to store.
Skipping the Sanding and Finishing Step
Skipping the sanding and finishing step is another common mistake that can make your walnut shelves look unfinished or even cause damage over time. Sanding is essential for smoothing the wood and preparing it for a protective finish.
A quality finish (such as polyurethane or oil) not only enhances the wood’s natural beauty but also adds durability, protecting it from scratches, stains, and moisture. Always take the time to sand your shelves thoroughly and apply a finish that complements the wood’s rich color and grain.
Conclusion
DIY walnut floating shelves are a stylish and practical way to enhance your home, offering both aesthetic appeal and functional storage. By following the right steps and avoiding common mistakes, you can create high-quality, personalized shelves that fit your space perfectly. With a little time and effort, your DIY project will provide lasting beauty and organization.