

Introduction: DIY floating shelves
Looking for a simple way to enhance your home’s functionality and style? DIY floating shelves are the perfect solution! Whether you’re aiming for a chic look in your living room or need practical storage in your kitchen, floating shelves are an easy yet effective way to upgrade any space. Building them yourself adds a personal touch and saves money while giving you full control over the design and style.
Why DIY Floating Shelves?
Transform your space effortlessly with DIY floating shelves that combine style, utility, and customization. Floating shelves offer a minimalist design that makes your home feel more open and organized. The best part? You don’t have to be a professional carpenter to install them! This DIY project is budget-friendly and offers endless customization possibilities, from the materials used to the final finish. You’ll be able to create shelves that perfectly match your room’s aesthetic while enjoying the satisfaction of building them yourself.
What to Expect in This Guide
Get ready to master the art of creating stunning DIY floating shelves with this step-by-step guide! In this guide, we’ll walk you through everything you need to know, from selecting the right materials to mounting your shelves securely. Whether you’re a beginner or a seasoned DIYer, this guide will ensure your project is a success!
Benefits of DIY Floating Shelves
DIY floating shelves offer more than just storage; they transform your living space in so many ways. Let’s explore the key benefits that make them a must-have in any home!
Space-Saving
Maximize your living space without sacrificing style. DIY floating shelves are perfect for tight spaces as they don’t require bulky furniture. By mounting shelves on the wall, you free up valuable floor space, making small rooms feel more open and airier. This makes them ideal for apartments, studios, or any space where you want to make the most of every inch!
Aesthetic Appeal
Instantly elevate your room’s aesthetic with minimal effort. Floating shelves offer a sleek and modern design that adds sophistication to any room. Whether you’re styling your living room, bathroom, or kitchen, these shelves enhance the visual appeal of your space without overpowering it. Plus, the floating effect gives a contemporary, airy vibe that complements various interior styles.
Cheap DIY Floating Shelves
Why spend big on pre-made shelves when you can create your own for a fraction of the cost? DIY floating shelves are an affordable way to add high-end appeal to your home. All you need are simple materials like wood, brackets, and some tools, making this project a budget-friendly alternative to expensive store-bought shelves. With just a few dollars, you can achieve the same elegant look!
Easy DIY floating shelves Customization
Tailor your shelves to match your personal style and needs. One of the biggest advantages of DIY floating shelves is the ability to customize them. From the size and shape to the material and finish, you have full control over the design. Whether you prefer rustic wood, sleek modern finishes, or even painted shelves, you can create a one-of-a-kind piece that fits perfectly in your home.
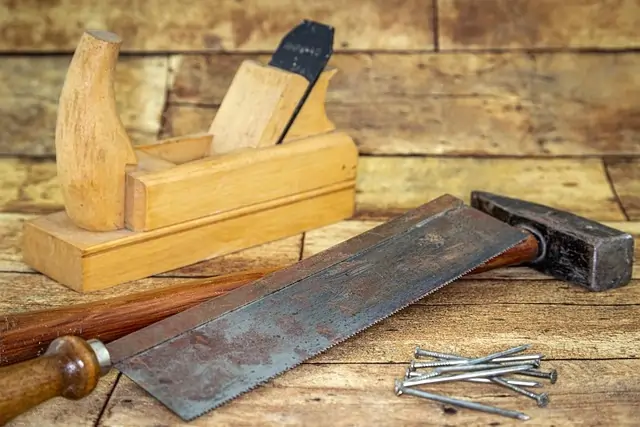
Materials and Tools You’ll Need for DIY Floating Shelves
Building your own floating shelves requires the right materials and tools to ensure the project is successful. Let’s explore everything you’ll need to get started!
DIY floating shelves Materials
DIY floating shelves solid Wood (plywood, MDF, solid wood, or pallet wood)
The foundation of your floating shelves lies in the wood you choose. Whether you opt for plywood, MDF, solid wood, or repurpose pallet wood, each material offers unique benefits. Solid wood gives a timeless, sturdy look, while MDF and plywood are lighter and more affordable. Choose the material that matches your style and the weight of the items you plan to store.
Strong DIY floating shelves (Screws, brackets, wall anchors)
Strong shelves need strong support. Screws, brackets, and wall anchors are essential for securely mounting your floating shelves on the wall. Make sure to choose high-quality screws and anchors that can handle the weight of your shelves and items. The brackets should be sturdy, as they support the floating effect.
Paint/stain/finish (if customization is involved)
Add a personal touch with paint, stain, or finish. Customizing your shelves is where the fun begins! Whether you prefer a natural wood look or want to paint them to match your decor, a good-quality finish will protect your shelves while enhancing their aesthetic appeal. Choose a stain or paint color that complements your space and gives your shelves a professional, polished finish.
DIY floating shelves Wood glue
For added security and a seamless look, consider using wood glue. If you’re joining pieces of wood together or want to add extra support, wood glue can help reinforce the structure. It ensures that the shelves are solid and long-lasting, especially when combined with screws.
DIY floating shelves Tools:
Gather the right tools for precise, safe construction. A measuring tape is essential for ensuring your shelves are the perfect size, while a saw helps cut wood to the correct dimensions. A drill and screwdriver are necessary for installing brackets and securing screws, and a level ensures your shelves are straight. Don’t forget safety gloves and goggles to protect yourself during the project!
Step-by-Step Guide How to Build DIY Floating Shelves
Building your own floating shelves is a rewarding DIY project that can completely transform your space. Follow this step-by-step guide to create sturdy, stylish shelves that will look great in any room.
How to make DIY Floating Shelves
The key to a successful floating shelf project starts with proper planning and design. Begin by measuring the area where you want to place your shelves. Take note of the wall space available, the weight capacity you need, and the overall style you’re aiming for. Sketch out your design—considering dimensions, shelf depth, and wood types. A little planning now will ensure the project goes smoothly later!
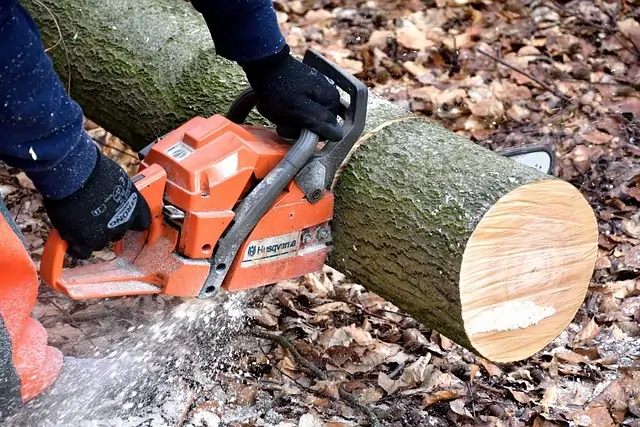
Cutting and Preparing the Wood
It’s time to turn your vision into reality! With your design in hand, it’s time to cut the wood to size. Using a saw, carefully measure and mark the wood before cutting to avoid mistakes. If you’re new to woodworking, take your time, and use a guide to ensure straight cuts. Once cut, sand the edges to smooth out any rough spots. This step ensures your shelves are ready for assembly and will look professional.
Assembling the Shelves
Now that your wood is prepped, it’s time to assemble the shelves. Begin by joining any pieces of wood that need to be connected. Use wood glue for extra security, then reinforce the joints with screws for a solid, lasting structure. If you’re creating a floating shelf with brackets, make sure to install the brackets securely to the wood to prevent any shifting once mounted. Ensure everything is aligned and flush for a seamless look.
How to install DIY floating shelves on the Wall
This is the moment when your shelves come to life! To mount your shelves, first mark the spots on the wall where the brackets will go. Use a level to ensure they’re straight before drilling pilot holes. Then, install the brackets into the wall anchors to support the weight of the shelf. Once everything is in place, carefully slide the shelf onto the brackets, ensuring it’s secure and aligned properly with the wall.
Leveling and Securing the DIY Floating Shelf
The final step is ensuring your shelf is perfectly level and secure. Use a level to double-check that your shelf is sitting straight. Tighten the screws or bolts on the brackets to ensure the shelf stays in place. This step is crucial for both functionality and aesthetics, as an uneven shelf can ruin the look of your hard work. Once secure, your floating shelf is ready to use!
How DIY floating shelves Design and Customization
Floating shelves not only offer storage but also provide an opportunity to showcase your creativity and style. Let’s explore how you can customize and design your shelves to match your unique aesthetic!
Decorating Your Shelves: Paint, Stain, and More
Give your shelves a personalized touch with the right finish. Whether you prefer the natural look of wood or want to add a splash of color, decorating your floating shelves is an easy way to express your style. opt for a paint color that complements your room’s palette, or choose a stain to highlight the wood’s grain.
If you’re going for a rustic look, consider distressing the wood. A matte finish can add sophistication, while a glossy finish will create a sleek, modern vibe. Don’t forget, a well-chosen finish enhances the shelf’s durability as well!
DIY floating shelves Storing Items: Books, Plants, and Décor
The real beauty of floating shelves lies in how you arrange the items on them. Display your favorite books, art, or family photos to create a cozy, personal space. Add a touch of greenery with indoor plants, which not only brighten up the shelves but also improve air quality.
For a minimalist design, opt for simple décor items like candles or vases. For a bolder look, mix and match different textures and heights for an eclectic, artsy feel. Always ensure that the items you display are in proportion to the size of your shelves to keep everything balanced.
DIY floating shelves (Living Room, Kitchen, Bathroom)
Customize your floating shelves to fit the function and style of different rooms in your home. In the living room, use floating shelves to display artwork, plants, or a curated collection of books and family photos. For the kitchen, floating shelves can store frequently used items like spices, jars, or mugs, giving your kitchen a more open, airy feel.
In the bathroom, install smaller floating shelves to hold toiletries, towels, or decorative pieces. In the bedroom, they’re perfect for adding extra storage or displaying personal mementos. The possibilities are endless—just choose what works best for the space!
Shelf Placement and Wall Preparation
Why it Matters
The success of your floating shelf project begins with proper placement and wall preparation. Incorrect placement can lead to instability and risk of damage, making this step crucial for long-lasting results.
Wall Material Identification
Before you start, identify the wall material—drywall, concrete, or brick. This ensures you’re using the correct anchors and screws, providing the support needed for a sturdy shelf installation.
Wall Stud Finding & Anchors
Locating wall studs is essential for securing your shelves. Use the right anchors to ensure that your shelves are firmly held up, capable of bearing weight without sagging or shifting.
Common Mistakes to Avoid
While DIY floating shelves are a great project to tackle, there are a few common pitfalls that can affect the quality and durability of your shelves. Let’s walk through the mistakes you’ll want to avoid to ensure a perfect final result.
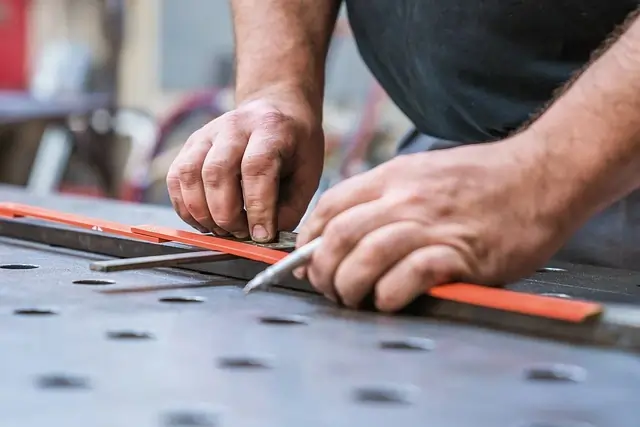
Not Measuring Correctly
It might seem like an obvious step, but inaccurate measurements can ruin your project. Before you start cutting or mounting, ensure that your measurements are precise. Double-check the wall space and shelf dimensions to ensure everything fits perfectly. Remember, even a small mistake in measuring can lead to uneven shelves or a poor fit. So, take your time with measuring, and use a level to confirm everything is aligned before you begin!
Mounting Issues
One of the most frustrating mistakes is improper mounting, which can lead to sagging or even shelves falling off the wall. Make sure you use the correct brackets and anchors based on the weight of your shelf. It’s also important to mount the shelves into wall studs, rather than just the drywall, for better stability. Using strong and secure anchors is key to ensuring that your shelves stay in place for the long term. Don’t skip this step—your floating shelf’s strength depends on solid mounting!
Uneven Shelves
An uneven floating shelf can ruin the entire look of your room. One of the biggest culprits behind uneven shelves is improper leveling during installation. Always use a level to check that your shelves are perfectly straight before you secure them in place. This small tool will help you avoid the frustrating sight of a crooked shelf, and ensure that everything stays neat and tidy. Remember to recheck your work before tightening any screws or bolts.
Troubleshooting Common Problems
Even with the best DIY floating shelf project, you might encounter a few issues along the way. Don’t worry—these problems are solvable! Let’s walk through the most common problems and how to fix them to ensure your shelves stay sturdy and visually appealing.
How to mount DIY floating shelves (Wall Mounting Issues)
If your floating shelves are not staying up or are wobbly, the problem could lie with your wall mounting. The most common mistake is not properly anchoring the shelves into wall studs. When mounting floating shelves, make sure you use the correct wall anchors and screws for the material of your wall (drywall, plaster, brick, etc.).
If you’re mounting on drywall, be sure to use toggle bolts or heavy-duty anchors for better weight distribution. If possible, always aim to mount into studs for optimal support. Re-check your anchors and screws, and make sure they’re securely attached before putting items on the shelves.
DIY heavy duty floating shelves (Sagging Shelves)
Sagging shelves are a sign that your installation might not be strong enough to bear the weight. If you notice your floating shelves are bowing or sagging in the middle, this could be due to insufficient support. To prevent sagging, ensure you are using strong brackets or shelf cleats that are able to support the weight.
If you’re using wood, opt for denser, more durable wood like oak or walnut. For larger shelves, consider adding extra support in the center or using thicker materials. Additionally, be mindful not to overload your shelves with too much weight.
Uneven Alignment
One of the most frustrating issues is when your floating shelves are misaligned, ruining the aesthetic appeal of your space. Uneven alignment is often caused by a lack of proper leveling. Ensure that you use a spirit level during installation to check that the shelves are perfectly straight both horizontally and vertically.
If your shelves are still misaligned after installation, you may need to remove them, adjust the brackets, and reinstall the shelves carefully. Small adjustments can make a huge difference in achieving a polished, clean look.
Conclusion: DIY floating shelves
DIY floating shelves offer a fantastic way to enhance your home’s functionality and aesthetic without breaking the bank. By following the step-by-step guide and avoiding common mistakes, you can successfully create your own custom floating shelves that will last for years. Whether you’re looking to add extra storage, display your favorite décor, or save space, DIY floating shelves are the perfect solution.
Remember, the key to success is planning ahead, using quality materials, and ensuring that your mounting and alignment are spot on. Troubleshooting problems along the way is just part of the journey, but with the right guidance, you’ll be able to fix any issue with ease.
Now it’s time to get started! With the right materials, tools, and a little creativity, you can create beautiful, functional floating shelves that will transform any space in your home.
Good luck with your DIY floating shelf project, and enjoy the satisfaction of creating something truly unique and tailored to your needs!