
Why Air Conditioner Leaking Water Inside
Is your air conditioner leaking water inside your room or inside your furnace? Don’t panic! Here’s everything you need to know to solve the problem.
Water leakage from your air conditioner can cause significant damage to both the unit and the surrounding areas, such as inside rooms and furnaces. If not addressed promptly, it can lead to mold growth, water stains, and even structural damage. But don’t worry—this article will guide you through the causes and solutions, ensuring you can fix the issue without hassle. Let’s dive in and stop the leak before it becomes a big problem!
Common Causes of Air Conditioner Leaking Water Inside
Cause 1: Clogged Drain Line
The drain line of your air conditioner plays a crucial role in removing the condensation that builds up as the system cools the air. It is typically a small pipe that directs the excess water outside your home. However, if the drain line gets clogged with debris, dirt, or mold, the water can’t flow out properly.
This blockage forces the water to back up into the unit, and eventually, it begins to leak inside the room or even into the furnace area. As the water accumulates, it can lead to significant damage to your AC and surrounding areas if not addressed promptly.
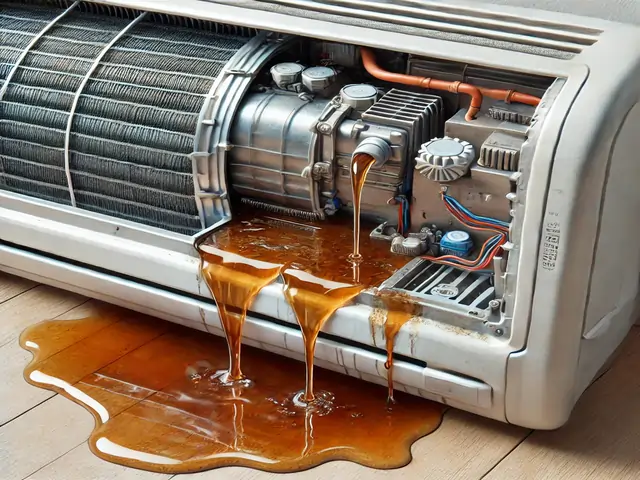
Cause 2: Faulty Drain Pan
The drain pan is located beneath your air conditioner’s evaporator coil, catching any excess water that drips off the coil during the cooling process. When this pan becomes broken or disconnected, the water that should be directed into the drain line will leak out and accumulate inside your room or even the furnace.
Over time, a damaged pan can cause water to pool around the unit, leading to water damage in the surrounding area. If the drain pan is not in place, it can also cause the AC to malfunction and result in significant water leakage.
Cause 3: Ice Buildup Due to Low Refrigerant
When your air conditioner’s refrigerant level is low, it can cause the evaporator coil to freeze. This occurs because the refrigerant is responsible for absorbing heat from the air, but when it’s insufficient, the coil doesn’t get cold enough to evaporate the moisture properly.
Instead, the moisture on the coil freezes, creating ice buildup. As the ice melts, it leads to excess water dripping inside your room or furnace. This can cause significant water leakage, damage to your AC, and potential harm to the surrounding area if not fixed promptly.
Cause 4: Dirty Evaporator Coil
The evaporator coil is an essential part of the air conditioning system, as it absorbs heat from the air. When the coil becomes dirty, it becomes less efficient at heat transfer, which causes it to freeze. This buildup of ice on the coil results in excess condensation when the ice melts, leading to water leakage inside your room or furnace.
The dirt and debris that accumulate on the coil prevent the system from operating properly, increasing the risk of water damage. Regular maintenance of the evaporator coil can prevent this issue and help your AC run smoothly.
Cause 5: Malfunctioning Pump
The pump in your air conditioner is responsible for pushing the water through the drain line and away from the system. If this pump malfunctions or fails to operate properly, it can’t effectively push the water out of the unit. As a result, water begins to accumulate inside the unit, which can lead to leakage inside your room or furnace.
A malfunctioning pump may occur due to wear and tear, electrical issues, or improper maintenance. Regular checks and prompt repairs are necessary to ensure the pump works efficiently and prevents water leakage.
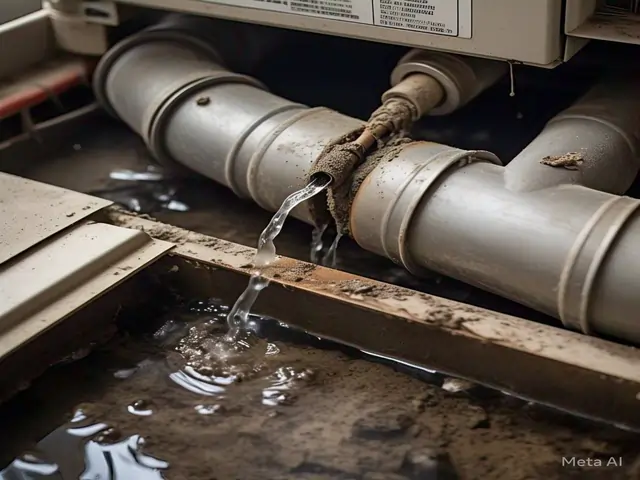
Cause 6: Broken Condensate Drain System
The condensate drain system is responsible for carrying the water produced by the air conditioner’s cooling process out of the unit. If this system breaks or becomes damaged, it can no longer perform its function of draining water effectively.
This results in water leakage that can enter your room or furnace. A broken condensate drain can be caused by cracks, blockages, or general wear and tear. Regular maintenance and inspection of the condensate drain system are essential to ensure it’s working properly and to prevent costly water damage.
Cause 4: Dirty Air Filters
Dirty air filters are one of the most common causes of water leakage inside your room or furnace. Air filters are designed to trap dust, dirt, and debris from entering the air conditioner’s system. However, when they become clogged with dirt, they restrict airflow, causing the evaporator coils to become colder than usual. This leads to increased condensation on the coils, which then drips into the unit and causes water leakage. Regularly cleaning or replacing the air filters ensures optimal airflow and helps prevent condensation buildup.
Cause 5: Improper Installation
Improper AC installation can cause a variety of issues, including drainage problems that lead to water leakage inside your room or furnace. If the air conditioner is not installed at the correct angle, or if the drainage pipes are not properly aligned, water may not flow smoothly through the drain system. This can result in clogging or improper water disposal, leading to water leakage. It’s crucial to ensure that your AC is installed by a professional who can guarantee proper drainage and avoid future issues.
Signs You Have an Air Conditioner Water Leakage Problem
Pooling Water Around the Unit
If you notice water pooling around your AC unit or on the floor, especially inside your room, it could be a sign of a water leakage problem. This often happens when the drain line becomes clogged, or the drain pan is faulty, preventing water from flowing out properly.
Over time, this water can damage the floor, walls, and even the surrounding furniture. If you spot pooling water, it’s essential to address the issue promptly to avoid further damage and prevent mold growth.
Water Dripping from Vents
If you notice water dripping from your AC vents, it could indicate a serious water leakage problem. This happens when condensation builds up inside the AC system and has no place to go, causing it to leak through the vents. The water can eventually cause damage to the walls, ceilings, and even the flooring around the vents. It’s crucial to fix the issue quickly to prevent water damage and mold growth, especially in rooms with high humidity levels.
Moisture and Mold Around the AC
If you notice moisture or mold forming around your AC, it’s a clear sign of internal water leakage. This typically happens when water leaks inside the AC system and spreads to the surrounding areas, especially around the furnace.
Moisture buildup can lead to mold growth, which can damage both your AC and the surfaces around it. If left untreated, mold can spread and affect your indoor air quality, posing a health risk. It’s important to address the issue as soon as possible to prevent further damage.
How to Fix Air Conditioner Water Leakage Inside: A Complete DIY Guide
Step 1: Turn Off the AC and Inspect the Unit
Safety is the priority when dealing with any AC issue. Turn off the AC and disconnect the power supply before starting any inspection. Once the power is off, carefully inspect the unit for any visible issues like leaks, ice buildup, or loose connections.
Pay close attention to areas near the furnace and inside the room, as these are common spots where water leakage can occur. Identifying the source of the problem early on will make it easier to fix and prevent further damage.
Step 2: Clear the Drain Line
If the cause of the water leakage is a clogged drain line, it’s time to clear the blockage. Start by using basic tools such as a wet/dry vacuum or a small plumbing snake to remove the clog. You can also try pouring a mixture of warm water and vinegar into the drain line to dissolve any gunk.
Be gentle and avoid forcing anything through the pipe, as this may cause damage. Once the blockage is cleared, flush the drain line with clean water to ensure it is functioning properly and no further blockages remain.
Step 3: Inspect and Replace the Drain Pan
The drain pan is an essential part of your AC unit that catches water as it drips from the evaporator coils. If the pan is damaged or cracked, water can leak inside the room. To inspect the pan, carefully remove the panel of your AC and locate the drain pan beneath the evaporator coils.
Check for any visible cracks or damage. If the pan is damaged, it needs to be replaced. You can purchase a replacement pan from your local hardware store or online. Once you have the new pan, carefully install it in the same position, ensuring it fits securely and is aligned properly to prevent further leakage.
Step 4: Clean the Air Filters and Coils
Cleaning the air filters and evaporator coils is an essential part of maintaining your AC and preventing water leakage. Dirty filters restrict airflow, which can lead to excess condensation, causing water to leak inside your room. To clean the filters, simply remove them from the unit and wash them with warm, soapy water.
Let them dry completely before reinserting them. For the evaporator coils, use a coil cleaner or a soft brush to remove dust and debris. Be careful not to damage the coils while cleaning. Regular cleaning will help your AC run more efficiently and prevent water leakage caused by poor airflow or excess condensation.
Step 5: Refill Refrigerant (if required)
If your air conditioner is low on refrigerant, it can cause the evaporator coil to freeze and thaw, leading to water leakage. To check the refrigerant levels, locate the service valve on your AC unit. If you notice a significant drop in pressure, it’s likely that the refrigerant needs to be refilled.
You can purchase refrigerant from a hardware store, but refilling refrigerant requires knowledge of AC systems. If you’re not confident, it’s best to call a licensed professional to handle the job. They will check for leaks, refill the refrigerant, and ensure the system is running efficiently, preventing further water leakage.
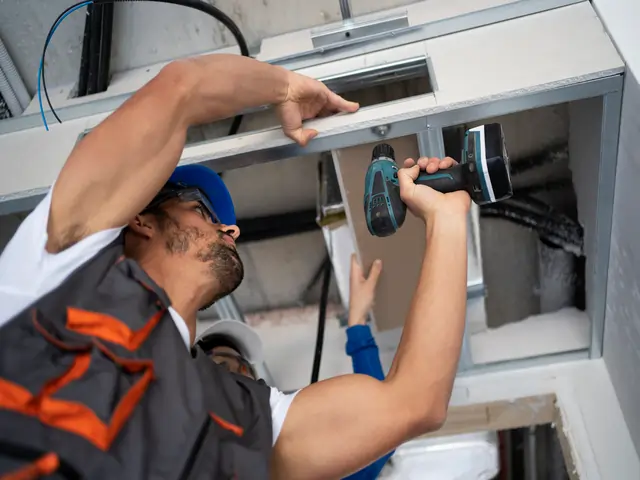
Step 6: Check the Installation and Leveling
If your AC unit is not properly installed or is misaligned, it can cause drainage issues, leading to water pooling inside your room or furnace area. To ensure proper installation, first check the level of the unit. Use a spirit level to confirm that the AC is slightly tilted towards the drain side. If it’s uneven, water may not flow correctly into the drain pan, causing leakage.
Additionally, inspect the positioning of the unit to ensure it is not obstructed by furniture or objects that could block airflow and drainage. If you notice any alignment issues, it’s important to realign the unit or contact a professional to reinstall it correctly to prevent further leaks.
Preventing Water Leaks in Your Air Conditioner: Best Practices
Routine AC Maintenance Tips
Regular maintenance is key to avoiding water leakage in your air conditioner. Start by cleaning the air filters every month to maintain proper airflow. Clogged filters can increase condensation and cause water to leak inside your room. Next, inspect the evaporator coils for dirt buildup, as dirty coils can lead to freezing and water leakage.
It’s also important to clear the drain line regularly to prevent blockages. Perform these tasks seasonally, before the summer heat hits, to ensure your AC works efficiently without causing leaks. Lastly, check the drain pan and make sure it is intact and properly aligned to collect water effectively. Regular maintenance can save you from costly repairs and keep your AC running smoothly.
When to Call a Professional
While many of these maintenance tasks can be handled by yourself, there are times when it’s best to call a professional. If you notice persistent water leakage inside your furnace or if the issue seems complex, like low refrigerant levels or faulty components, it’s time to contact an expert.
Professionals have the tools and knowledge to diagnose and repair issues that are beyond DIY fixes. They can also ensure that your AC is running at optimal performance, preventing further leaks and improving efficiency.
Conclusion: Fix Your AC Leak & Stay Cool
Dealing with an air conditioner leaking water inside can be frustrating, but don’t let it stress you out! By identifying the root causes and following the simple DIY fixes, you can solve the problem on your own and get your AC back to optimal performance.
Whether it’s clearing the drain line, replacing a damaged drain pan, or refilling refrigerant, these manageable tasks can save you time, money, and hassle. Remember, regular maintenance is the key to preventing future leaks and ensuring that your AC keeps running smoothly all year long!