
What is a Raised Garden Bed?
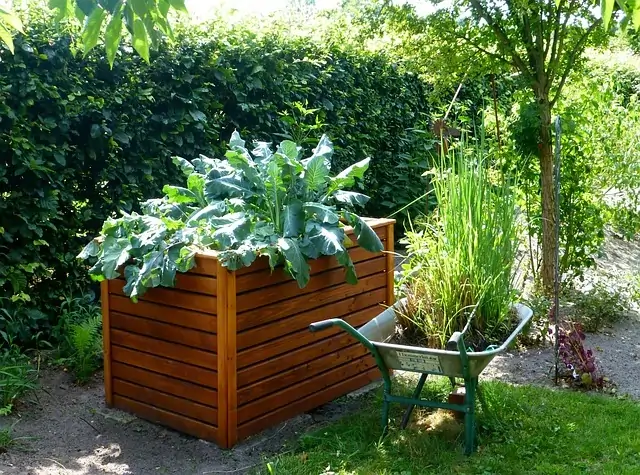
A DIY raised garden bed is simply a garden bed above the ground. You build it using materials like wood, metal, or stone to hold soil and plants. When I built my first raised garden bed for my home, I realized how much easier it made gardening.
It helps with drainage, soil quality, and keeps pests at bay. Plus, it makes gardening way more accessible, especially if you have poor soil or limited space.
How Does a Raised Garden Bed Work?
Raised beds work by lifting the soil above ground level. This allows for better drainage and root growth. When I started gardening with raised beds, I noticed that my plants grew faster and healthier.
The height also made it harder for pests to get in, and the soil warmed up quickly, giving me an early start to gardening season. It’s a simple yet effective way to create a better environment for your plants.
Different types of raised garden beds
When I started planning my raised garden beds, I quickly realized there are various options available, each bringing its own unique benefits. Wooden beds were my first choice because they’re easy to build and customize, making them perfect for nearly any plant.
If you’re after something long-lasting with a rustic charm, stone or brick beds are the way to go. They add a natural, permanent feel to your garden. For a sleek, modern look, metal beds are durable and stylish, though they might be a bit pricier.
If you’re looking for a no-fuss, affordable option, stock tank beds are perfect. Originally designed for livestock, they’re tough and easy to set up. Finally, for an eco-friendly choice, composite beds made from recycled materials are a great option. They’re built to last and are sustainable, making them a solid investment for a long-lasting garden.

Benefits of Raised Garden Beds
When I first decided to try a raised garden bed, I was amazed by how much easier it made gardening. One of the biggest benefits I noticed was better soil control and drainage. Raised beds provide excellent drainage, which prevents water from pooling and helps the roots get the oxygen they need.
Another huge benefit is fewer weeds and pests. Since the soil is raised, it’s easier to manage weeds, and the frame can act as a barrier against pests. I used to struggle with weeds in the garden, but with a raised bed, that’s no longer a problem.
Lastly, I saw an extended growing season and higher yields. Raised beds warm up faster in the spring, giving you an earlier start to the growing season. Plus, the added depth allows the roots to grow stronger, leading to bigger, healthier plants and a higher yield.
Choosing the Right Location for Your Raised Garden Bed
When I first set up my DIY raised garden bed, I realized that the location plays a huge role in how well your plants thrive. Sunlight was a big factor—plants need about 6-8 hours of direct sunlight each day. I made sure to choose a spot that gets plenty of sun, as this helped my plants grow much better.
The next thing I learned was the importance of soil conditions. Raised garden beds need good drainage to prevent waterlogging, so I picked a spot with slightly elevated ground. This ensures the water doesn’t accumulate too much. To further improve the soil, I added compost and organic matter, which increased its fertility and moisture retention.
Another thing to consider is accessibility. You don’t want your garden to be hard to reach. I chose a location that was near my house, so watering and tending to my plants became easier and more consistent. It’s also important to make sure the bed is at a convenient height for easy maintenance.
Best Plants to Grow in a Raised Garden Bed
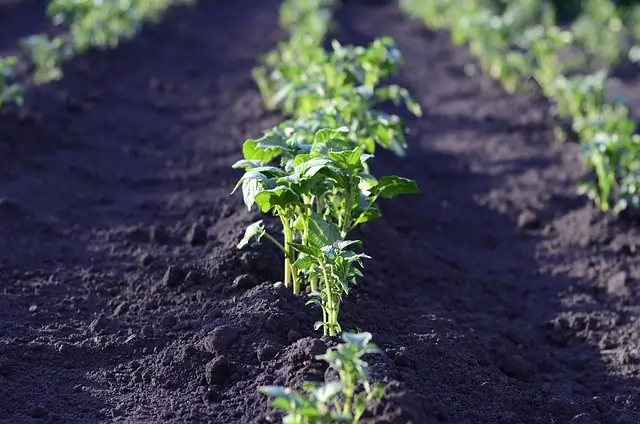
When I set up my DIY raised garden bed, choosing the right plants was one of the most rewarding parts. I discovered that vegetables like tomatoes, lettuce, and spinach thrive in raised beds. They love the well-drained soil and quick warming of the ground in spring, which helps them grow faster.
These are great choices if you want fast-growing harvests. I also found that herbs like basil, parsley, and rosemary do wonderfully in raised beds. They don’t need deep soil, making them perfect for the compact space of a raised bed, and they’re super easy to maintain.
One of my favorite things to do was mix vegetables, herbs, and even fruits like strawberries together in one bed. I added flowers like marigolds around them, and it helped keep pests away while attracting pollinators. Plus, the flowers made my garden look beautiful and vibrant!
Lastly, I decided to plant a cutting garden in one of my raised beds for flowers like sunflowers, roses, and zinnias. These flowers were not only gorgeous but also perfect for creating stunning arrangements at home.
Essential Tools & Materials for a DIY Raised Garden Bed
Tools Required
- Saw (for cutting the wood)
- Drill and Drill Bits (for making holes)
- Level (to ensure the bed is straight)
- Hammer (for driving nails)
- Shovel (for mixing soil and compost)
- Wheelbarrow (for transporting soil and materials)
Materials Required
- Screws and Nails (for fastening)
- Screws and Nails (for fastening)
- Landscape Fabric (for weed control)
- Soil (for filling the bed)
- Compost (to enrich the soil)
When I started building my DIY raised garden bed, I quickly learned that the right tools and materials can make all the difference. For the wood, I went with cedar because it’s naturally resistant to rot and insects, making it ideal for outdoor use.
It’s also durable enough to withstand the weather, and it has a beautiful natural look that blends perfectly with my garden. If you want a more budget-friendly option, pine works well too, but be sure to treat it to prevent damage over time.
Next, for the soil, I did some research and found that a good mixture of topsoil, compost, and aged manure provides the best drainage and nutrients for healthy plant growth. I made sure to buy organic compost to avoid any chemicals that might harm the environment.
When it comes to tools, a saw and drill were my go-to items for cutting the wood and assembling the bed. I also used a level to ensure everything was perfectly aligned. A shovel for digging and a wheelbarrow for transporting soil were also essential for keeping things efficient and manageable.

How to Build Your Dream Raised Garden Bed Step-by-Step
1.Start Strong: Measure the Boards for Perfect Fit
First, grab your measuring tape and start with the wooden boards. Measure accurately to ensure your boards fit together seamlessly, avoiding unnecessary cuts later on. This step is crucial because proper measurements will save time and ensure a stable foundation for your bed.
2.Mark the Angles with Precision for a Solid Structure
Once you have your measurements, use a pencil and square to mark the angles of the boards. Marking the angles with precision is essential for creating sturdy corners that will hold up under pressure. This simple trick prevents mistakes that could lead to instability later.
3.Drill with Confidence to Secure Your Frame
With the angles marked, it’s time to drill. A power drill is your best friend here. Secure the boards together by drilling through the ends. This helps to ensure a strong, secure frame. I always double-check my holes to ensure they’re aligned properly for the most durable finish.
4.Attach the Framing Angles to Build a Sturdy Foundation
Now, it’s time to attach the framing angles. These are the key to a solid foundation. Use corner brackets or metal braces to keep the structure intact. This ensures that the raised garden bed can withstand the elements and heavy use throughout the growing season.
5.Keep Going: Assemble the Sides for a Growing Frame
Next, assemble the sides of your garden bed. Secure each panel using screws to ensure the structure is tightly held together. A secure frame means better support for the soil, and it makes the bed easier to maintain in the long run.
6.Secure the First Corner for a Strong Start
After the sides are in place, focus on the first corner. Tighten all screws at the corner joints. A strong corner will help keep the frame from shifting over time. This is one of the most important steps in building a long-lasting raised garden bed.
7.Finish the Second Corner to Complete Your Vision
Once the first corner is secure, move on to the second corner and repeat the process. Make sure it’s squared off properly to keep the entire structure balanced. Each well-secured corner brings you closer to completing your perfect raised garden bed.
8.Double-Check Angles for the Perfect Shape
Before moving on, double-check the angles. Use a level to make sure everything is aligned properly. This ensures the frame is level, and the bed will function well for planting. Straight angles provide a more professional finish, and a level bed improves soil drainage.
9.Complete Your Raised Garden Bed and Start Growing!
Finally, finish your bed by securing any loose boards and filling it with rich, nutrient-dense soil. Now you’re ready to start planting! With your raised garden bed complete, you’ll have a functional and aesthetic space to grow your favorite plants. Happy gardening!
Common Mistakes to Avoid When Building a Raised Garden Bed
Building a raised garden bed seems straightforward, but trust me, I’ve made my fair share of mistakes. In this section, I’ll Walk you through some common pitfalls to avoid and share my experience to help you build a successful, long-lasting garden bed.
Choosing the Wrong Location
One of the biggest mistakes I made when I started building my raised garden bed was not choosing the right location. The location of your garden bed is crucial because it directly affects the growth of your plants. Make sure the spot you choose gets enough sunlight – about 6-8 hours of direct sunlight is ideal for most vegetables and herbs.
Another common mistake is placing the bed in an area where the soil conditions are not optimal. Choose a location where the soil drains well and is level to avoid waterlogging. I once had a bed where water kept pooling, and it caused root rot in my plants. Avoid this by choosing a spot with good drainage.
Using Poor-Quality Materials
When I first built my raised garden bed, I made the mistake of choosing cheap wood. Over time, it started to rot and weaken. The material you use is crucial for the longevity of your garden bed. opt for rot-resistant woods like cedar or redwood, or you can even use composite materials for a longer-lasting frame.
Another key factor is choosing the right soil. Low-quality soil can limit the growth of your plants. It’s important to use a blend of organic compost, topsoil, and good-quality garden soil to create the best environment for your plants to thrive. Adding a bit of vermiculite or perlite helps improve drainage and root health, which I learned the hard way!
Skipping Proper Drainage Setup
One mistake I’ve seen a lot of beginners make is not setting up proper drainage. Without good drainage, your raised garden bed can become a swamp during heavy rains, and the roots will suffer. Make sure you incorporate drainage holes in your bed and add a layer of gravel or small rocks at the bottom. This simple addition can make all the difference when it comes to healthy roots and plant growth.
I learned the importance of drainage after I built my first bed without considering this aspect. The plants suffered because the excess water couldn’t drain properly, and I had to rework the entire bed. Adding a landscape fabric layer can help prevent soil erosion while still allowing water to escape.
How to Secure a Raised Garden Bed
Another problem I encountered in my garden was wildlife. I had a beautiful garden bed, but the bunnies and deer were constantly eating my plants. Installing a picket fence around the garden bed helped keep these pests out. The fence doesn’t have to be too tall, just enough to prevent animals from getting through.
You can also use hardware cloth or chicken wire around the bed if you want extra protection. This also keeps your garden bed safe from digging animals like squirrels. I’ve had great success with this simple trick to ensure my garden stays safe and healthy.
Maintenance Tips for a Long-Lasting Raised Garden Bed
Give It Space
When I first started with my raised garden bed, I didn’t realize how important spacing was for plant growth. Crowded plants can easily lead to poor airflow and increased chances of disease.
So, always give each plant enough space to grow. This will not only improve their health but also increase yields. Spreading plants in your raised bed is key to promoting air circulation and allowing your plants to thrive.
Keep It Natural
One thing I’ve learned is the importance of using organic methods in maintaining your garden. Overusing chemical fertilizers can harm the soil’s health and the surrounding environment.
Instead, opt for natural compost, mulching, and using organic pest control methods. These not only keep the garden eco-friendly but also keep your plants safe. I noticed that switching to natural fertilizers helped my plants grow stronger and healthier.
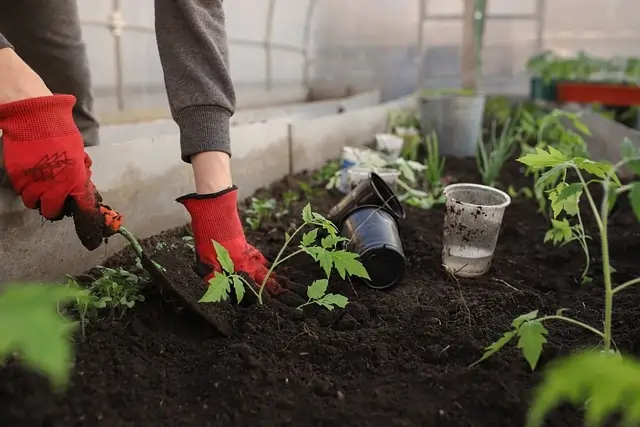
Anchor It with a Greenhouse
To keep your plants growing even in harsh weather, consider adding a greenhouse cover to your raised bed. It’s not only a great way to protect your plants from wind or frost but also extends the growing season, which has been a game-changer for me. If you want to grow more delicate plants or extend your gardening opportunities, greenhouse anchors are the way to go.

Best Watering Techniques for Raised Beds
Watering was one of my initial struggles. Over-watering or under-watering can both harm your plants. The key is to use drip irrigation or a soaker hose. I found that these methods help deliver water directly to the plant roots without wasting water.
They are ideal for raised garden beds because they prevent water from sitting on top, which can cause the plants’ roots to rot. Adjust the watering based on weather, and always keep the soil moist but not soggy.

How to Maintain Soil Health and Fertility
Maintaining soil health is essential for any raised garden bed, and I’ve found that rotating crops is an effective way to keep the soil fertile. After each season, make sure to add compost and mix in organic matter to replenish the nutrients.
You can also try using cover crops like clover to improve nitrogen levels in the soil. Keep testing your soil’s pH levels and adjust as needed. Healthy soil leads to healthier plants, and that’s a lesson I learned from experience.
Natural Pest Control Methods for Raised Gardens
No one likes pests, and I learned the hard way that natural pest control is the way to go. Instead of relying on harsh chemicals, I use neem oil, diatomaceous earth, and companion planting to control pests in my raised garden bed.
For example, planting marigolds near vegetables like tomatoes can naturally repel pests. I’ve also started using homemade sprays that I make using ingredients like garlic and peppermint, which keeps bugs at bay without harming the plants.
Creative & Easy DIY Raised Garden Bed Ideas
Metal Stock Beds
One of the first DIY raised garden beds I built was made from metal stock tanks, and I absolutely loved it. They offer a rustic charm and are incredibly durable. Not only do they hold up well against the elements, but they also provide excellent drainage.
They’re perfect for gardeners who want something that’s low-maintenance but still looks stylish. I would suggest checking out corrugated metal as well for a slightly different aesthetic. This simple yet functional design worked wonders in my backyard and is easy for anyone to assemble.
DIY Tomato Cages
I used to struggle with tomato plants falling over in my garden, but once I started building my own tomato cages, it solved that problem. These DIY cages are simple to make and offer excellent support for tall tomato plants.
I found that using rebar, chicken wire, or even PVC pipes for the structure made it both sturdy and affordable. It’s an easy project for anyone, and it keeps your tomatoes organized and healthy.
Farm Panel Beds
If you’re looking for something simple yet stylish, farm panel beds are an excellent choice. When I first stumbled upon this idea, I was impressed with how easy they were to assemble. These metal panels are widely available, and you can create long-lasting frames with them.
Just attach the panels to the desired size and shape, and you’ve got yourself a durable and easy-to-maintain raised garden bed. I highly recommend them for anyone who needs something low-effort yet effective.
Arched Trellis Add-on
Adding an arched trellis to your raised garden bed can bring both form and function to your space. It’s a great way to grow climbing plants like peas or beans, while also saving space.
I used to grow cucumbers and tomatoes on my arched trellis, and it not only maximized my garden’s vertical space but also added a beautiful focal point.
You can easily make one by using wooden dowels or PVC pipes, and it’s a simple weekend project that will elevate your garden instantly.
Wine Barrel Planter
I’m a huge fan of repurposing old wine barrels as raised garden beds. They’re the perfect size for small plants, herbs, or even flowers. I’ve used wine barrels for my herb garden, and it gave the space a beautiful rustic feel.
Plus, the wooden structure of the barrel helps retain moisture in the soil, making it great for plants that need consistent watering. It’s a charming and eco-friendly way to add more garden space.
Vertical Raised Garden Bed Designs
Space-saving is something I always think about, especially with urban gardening. Vertical raised garden beds are a game-changer if you don’t have a lot of room. I’ve tried various designs, including using pallets, trellises, or even stacked containers to create vertical garden structures.
Not only does this design help with space efficiency, but it also makes harvesting easier. I love how it keeps everything organized and maximizes the growing area, especially for veggies like lettuce and herbs.
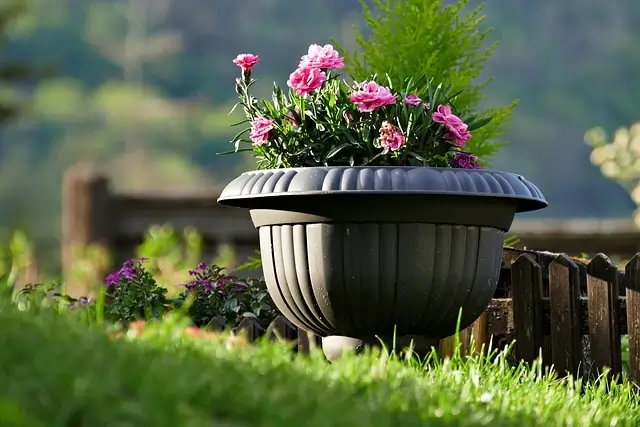
Small Space-Friendly Raised Garden Ideas
Living in an apartment didn’t stop me from having a garden. Small space-friendly raised garden beds are perfect for limited areas like balconies or rooftops. You can use compact wooden boxes, tiered planters, or even hanging gardens to maximize vertical space.
When I lived in a small apartment, I used window boxes for herbs and small flowers, which worked great. These ideas help you turn any small space into a productive garden while still looking aesthetically pleasing.
How to Decorate Your Raised Garden Bed
Decorating your raised garden bed can turn a functional garden space into a beautiful, inviting oasis. When I first started designing my raised beds, I found that adding simple touches made all the difference.
Not only do these decorative elements make the space more visually appealing, but they can also help enhance the growing environment. Let me walk you through some of the best ways to decorate your raised garden bed and add personal flair to your garden.
Adding Decorative Edging and Borders
One of the simplest ways to transform your raised garden bed is by adding decorative edging or borders. When I first set up my garden, I used brick edging, which added a rustic charm while helping to keep the soil in place.
Other options include wooden boards, stone borders, or even Corten steel. These borders not only define the garden bed but also give it a polished look. It’s a simple, yet effective way to make your raised garden bed stand out, and the best part is, you can find materials that fit any budget.
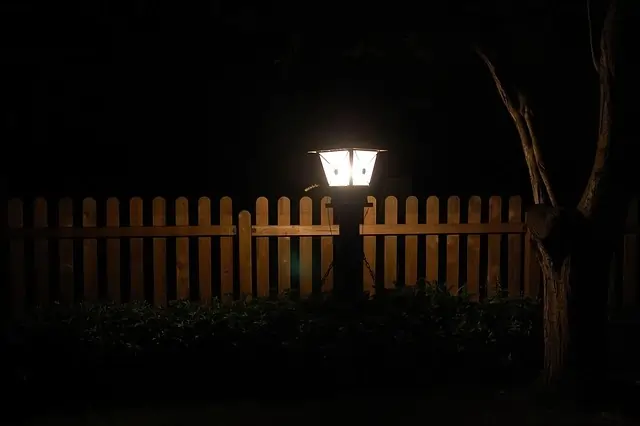
Using Lighting for an Aesthetic Look
Lighting is a game-changer when it comes to creating a warm and inviting garden space. I personally added string lights along the edges of my raised beds, and it instantly made the space feel more welcoming, especially during the evenings.
If you’re looking for a whimsical touch, consider adding solar-powered fairy lights or lanterns to your raised garden bed. I highly recommend lighting for evening gardening or simply enjoying your garden after the sun sets.
Incorporating Garden Accessories for Style
Another fantastic way to decorate your raised garden bed is by incorporating garden accessories that add both style and functionality. When I designed my raised garden beds, I included garden statues, birdbaths, and even decorative plant markers.
These accessories give the garden a personal touch, making it feel more like an outdoor living room. You can also add garden trellises or hanging planters to create a multi-dimensional look. The key is to balance decoration with practicality—each accessory should add value and functionality, not just appearance.
Cheap and Affordable DIY Raised Garden Bed Options
When I was working on my first raised garden bed, I wanted to create something functional yet affordable. At the time, I didn’t have a huge budget, but with a little creativity and resourcefulness, I was able to build a beautiful garden that didn’t break the bank. Here are some of my best tips for building cheap raised garden beds without compromising on style or function.
Cheapest Materials for Raised Garden Beds
When I started looking for materials, I quickly realized there were affordable options all around me. Instead of heading straight to the hardware store, I found wooden pallets to be an excellent choice. Not only are they easy to find, but they are also incredibly durable and perfect for making raised garden beds.
Cedar boards are also a solid option if you’re looking for a more weather-resistant material. I’ve even used cinder blocks for a more industrial look that’s surprisingly affordable. When choosing materials, think about what’s locally available and what works best for your garden’s climate.
DIY Raised Bed Ideas Using Recycled Materials
I’m all about upcycling, so when I made my first raised garden bed, I started with recycled materials. Old bricks from a construction site, unused wooden crates, or even concrete blocks can be repurposed into a sturdy raised bed.
One of my favorite projects involved using an old bathtub as a raised planter. Not only did it look unique, but it also gave me a lot of growing space without spending extra cash. By using recycled materials, you can create a customized look while keeping your garden eco-friendly and budget-conscious.
Make It Cottage Style
If you’re looking for a cozy, rustic vibe in your garden, go for a cottage-style raised bed. I made my own cottage garden by using weathered wood for a vintage look and filled it with hearty plants like lavender and roses.
Not only is it affordable, but it also adds a touch of charm. Cottage-style beds can also be personalized with vintage garden tools, cute benches, or rustic wooden crates, making it a great option for anyone looking for cozy charm on a budget.
Make an Herb Garden Coffee Table
One of my favorite budget-friendly raised garden ideas was converting an old coffee table into an herb garden. I simply drilled holes in the bottom for drainage, added a few layers of soil, and planted basil, parsley, and mint. This setup is not only practical, but it also gives you a cute, space-saving garden on a budget. Plus, it’s a perfect conversation starter when guests come over!

Use Reclaimed Material Beds
You’d be amazed at what you can do with reclaimed materials. I’ve used old fence panels, scrap wood, and even salvaged doors to create sturdy and unique raised garden beds.
Not only does it save money, but it also adds a lot of character to your garden. Each piece of reclaimed material has its own history and charm, making the finished product truly one-of-a-kind.
Vary Heights & Sizes
If you’re trying to build a garden on a tight budget, varying the heights and sizes of your raised beds can save you money and make the space more dynamic. I made my first garden with a mix of tall and short beds, which not only looked great but also allowed me to grow a variety of plants.
Taller beds work well for plants that need more space, while smaller beds can be used for herbs or flowers. Plus, varying heights can give your garden a more professional and organized appearance, even if it’s just a DIY project.
Conclusion: Let’s Make Your Dream Garden a Reality!
When I first built my raised garden bed, I had no idea what I was doing. But with a bit of effort and some creativity, I turned a simple idea into something amazing. And guess what? You can do it too!
Whether you’re working on a budget or using recycled materials, the possibilities are endless. Once those plants start growing, you’ll be amazed at what you’ve created. Your garden is within reach, and I’m here to help guide you every step of the way.
Grab your tools, get started, and let’s bring your garden vision to life. You’ve got this, and I’m cheering you on!