
Introduction : Replace a 1 1/2 galvanized wash machine drain pipe
Galvanized wash machine drain pipes are widely used in older homes but can pose serious problems as they age. These pipes, coated with zinc to prevent rust, eventually break down, leading to leaks, blockages, and poor drainage. If you’re experiencing any of these issues, it might be time to consider replacing them with newer, more durable materials.
Why You Need to Replace Them
Ignoring worn-out galvanized pipes can result in more than just plumbing headaches. Rusted pipes lead to slow drainage, leaks, and even water damage. Replacing them ensures a more efficient, safer, and longer-lasting drainage system, preventing costly repairs down the road.
Materials and Tools Needed for Replacing the Pipe
Materials Required
- Galvanized or PVC replacement pipe (1 1/2 inches, as per your needs)
- PVC primer and cement (for joining the pipes securely)
- Pipe fittings (elbows, couplings, etc.)
- Teflon tape (to seal threaded joints and prevent leaks)
- Pipe insulation (optional, for extra protection in cold weather)
Essential Tools
- Adjustable wrench or pipe wrench (to loosen and tighten pipe fittings)
- Hacksaw or pipe cutter (for cutting the pipe to the required length)
- Tape measure (to accurately measure the length of the pipe)
- Sandpaper (to smooth the ends of the pipe and fittings)
- Safety gloves and goggles (to protect yourself from sharp edges and debris)
- Bucket or towel (to catch water spills when removing the old pipe)
- Pipe cleaning brush (for cleaning pipe ends if necessary)
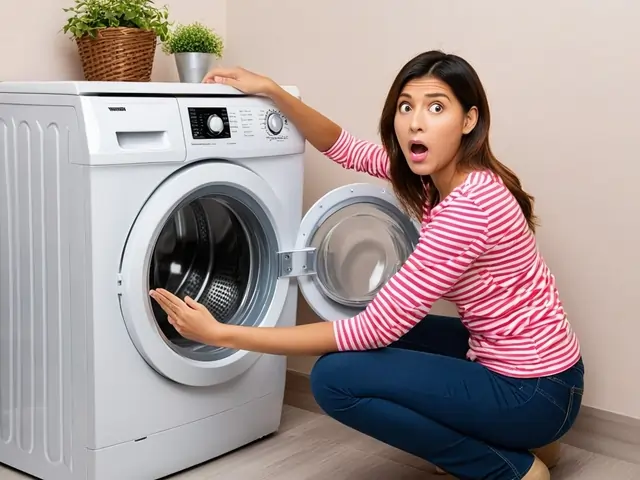
When Do You Need to Replace a Galvanized Wash Machine Drain Pipe?
Signs of Pipe Corrosion
One of the most obvious signs that it’s time to replace your galvanized wash machine drain pipe is visible corrosion. You may notice rust or flaking on the pipe surface, which indicates that the protective zinc layer has worn away. If left untreated, this corrosion can lead to leaks or total pipe failure. It’s crucial to replace the pipe before it gets worse to avoid costly repairs.
Frequent Leaks
Frequent leaks are another strong indicator that your galvanized pipe needs replacing. Even small leaks can be a sign of internal corrosion, and over time, these leaks may worsen. If you find yourself constantly repairing or patching up leaks, it’s time to consider replacing the pipe altogether for a more reliable and long-term solution.
Water Discoloration
If the water coming out of your washing machine has a brown or reddish tint, it’s a clear sign that your galvanized pipe is corroding. This discoloration occurs due to rust buildup inside the pipe. Even if the discoloration is occasional, it’s still important to monitor it closely, as it can indicate a more serious underlying issue with the pipe.
Odor Issues
A bad odor emanating from your drain pipe is another sign that the pipe may be deteriorating. As the galvanized pipe corrodes, it can develop blockages and trapped debris, leading to unpleasant smells. If cleaning and maintenance don’t solve the problem, replacing the pipe is the best way to eliminate the odor and restore proper drainage.
Age of the Pipe
The age of your galvanized pipe plays a significant role in determining whether it needs replacement. Galvanized pipes typically last about 20 to 50 years, but their lifespan can vary depending on water quality and usage. If your pipe is near or beyond its expected lifespan, it’s a good idea to replace it to prevent unexpected issues.
What Size and Material Should You Use to Replace Your Galvanized Pipe?
Choosing the Right Size Pipe
The size of the pipe is crucial for proper drainage. 1 1/2 inch is the standard for most washing machine drain pipes, but it’s essential to check your existing pipe size to ensure a proper fit. Choosing the correct size will help prevent leaks and drainage issues.
PVC vs. ABS Pipes
PVC pipes are lightweight, durable, and resistant to corrosion, making them a popular choice. ABS pipes are tougher and more resistant to impact, but PVC is generally preferred for its smooth surface that reduces clogs. Both materials are cost-effective and easy to install.
Why 1 1/2 Inch is the Standard
The 1 1/2-inch pipe is the standard size because it allows efficient water flow from washing machines. It’s big enough to handle water drainage without being unnecessarily large, ensuring proper drainage and minimal clogging issues.

Comprehensive Step-by-Step Guide to Replacing Galvanized Pipe
Step 1: Safety First
- Turn off the water supply to the washing machine to ensure there is no water flow while you’re working on the pipes.
- Unplug the washing machine to avoid electrical hazards during the pipe replacement process.
- Wear protective gloves and safety goggles to prevent injury from sharp edges of the pipe or falling debris.
- Ensure the work area is dry to avoid slipping. Wipe up any water from the floor before starting the process.
- Place a mat or tarp underneath the working area to catch falling debris or any water spills during the project.
- Double-check everything before starting the work to make sure the water is completely shut off, and no electrical hazards remain.
Helpful Tip: Safety is key! Always take a few extra minutes to ensure everything is secure before you start working.
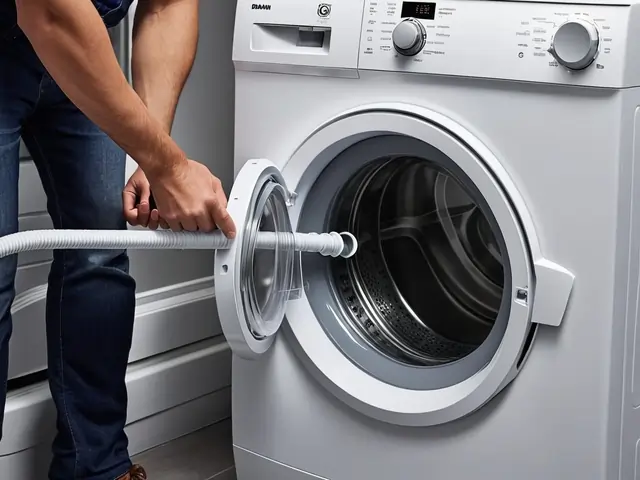
Step 2: Remove the Old Galvanized Pipe
- Loosen pipe connections using an adjustable wrench or pipe wrench. Apply counter-clockwise pressure to unscrew the connections.
- If rusted, apply penetrating oil and wait 10-15 minutes to loosen the corrosion. This will make it easier to disconnect the pipe.
- Catch any water spill by placing a bucket or towel under the pipe connections as water may spill when disconnected.
- Remove the old pipe completely. Once it’s loose, carefully take it out and dispose of it properly according to local disposal guidelines.
- Inspect the surrounding area for any additional damage or rust before you move forward with the new pipe installation.
Helpful Tip: Don’t rush! If connections are tight due to rust, give it extra time to loosen up with oil, or you might break the pipe.
Step 3: Measure and Cut the New Pipe
- Measure the new pipe with a tape measure to ensure it matches the length of the old pipe.
- Cut the new pipe using a hacksaw or pipe cutter for a precise fit. Make sure the cut is straight and smooth to prevent leaks.
- Ensure the cut is perfectly aligned so that the new pipe can fit into place easily and securely.
- Check the size of the new pipe and fittings to confirm they’re compatible with the old plumbing.
- If the pipe is too long, recheck your measurements and adjust the cut accordingly.
Helpful Tip: Measure twice, cut once! Ensuring precision now will save time and effort in the long run.
Step 4: Clean the Pipe Ends
- Wipe the ends of the pipe with a clean cloth to remove dirt, debris, and old sealant. This ensures a clean connection.
- Use sandpaper on the ends of the pipe to smooth out any rough edges or burrs. This will help the pipe fit more securely and prevent leaks.
- Clean the pipe fittings thoroughly. Make sure they are free of dirt, dust, or any old pipe adhesive that could interfere with the new connection.
- Inspect the cleaned pipe ends to ensure no leftover residue that could cause improper sealing.
- Dry the cleaned area completely before attaching the pipe to prevent any moisture from affecting the seal.
Helpful Tip: Cleaning properly ensures the seal will be tight and secure, preventing potential leaks later.
Step 5: Attach the New Pipe
- Apply PVC primer and cement to the pipe and fittings to ensure a strong bond. Follow the instructions on the primer and cement containers for best results.
- Insert the pipe into the fitting and twist slightly to spread the cement evenly.
- Hold the pipe in place for 15-20 seconds to allow the cement to set and form a firm bond.
- Ensure the pipe is properly aligned with the fitting before letting it set. Misalignment may cause leaks.
- Check that the pipe is seated properly before moving on to the next step.
Helpful Tip: Make sure the primer and cement are applied evenly, as an inconsistent application can lead to weak joints.
Step 6: Test for Leaks
- Turn on the water supply and check the connections for any signs of leaks. Use a flashlight to inspect the connections closely.
- Tighten the fittings if you notice any leaks. If tightening doesn’t help, apply more sealant or re-tighten the pipe.
- Wait for 5-10 minutes after turning on the water to ensure no delayed leaks appear.
- If no leaks are detected, finish up and allow everything to settle before use.
- Double-check the joints again to make sure they are completely secure.
Helpful Tip: After testing for leaks, allow some time to pass before finalizing the installation. Sometimes minor leaks take a while to show up.
Cost Estimates for Replacing the Pipe
DIY Replacement Costs
If you’re doing the replacement yourself, the cost is mainly for the materials. On average, DIY costs range between $50 to $150, depending on the pipe size and material chosen. You’ll need to buy a replacement pipe (PVC or ABS), pipe fittings, and tools, which can add up but is still cheaper than hiring a professional.
Professional Plumbing Costs
Hiring a professional plumber to replace your galvanized pipe can cost anywhere from $150 to $500, depending on your location and the complexity of the job. This price usually includes both labor and materials, but it can vary depending on the plumber’s rates and any additional services they provide.
Material Costs Breakdown
Material costs can vary based on the type of pipe you choose. PVC pipes typically cost around $1 to $3 per foot, while ABS pipes may cost a little more, ranging from $2 to $4 per foot. You’ll also need to factor in the cost of pipe fittings, sealants, and any additional materials required for installation.
Labor Costs Comparison
If you opt for a professional plumber, the labor costs are typically $50 to $150 per hour. The job could take 2 to 4 hours depending on the complexity, so total labor costs could range from $100 to $600. DIY is the more affordable option, but professionals ensure the job is done correctly and with a warranty.
Common Mistakes to Avoid When Replacing Your Drain Pipe
Not Measuring Properly
One of the biggest mistakes people make is not measuring the new pipe properly before cutting it. If the pipe is too short, you may struggle to connect it to the fittings; too long, and you may face issues with alignment. Always take accurate measurements, and double-check before cutting the new pipe to avoid wasted materials and time.
Not Cleaning the Pipe Ends
Before you attach the new pipe, make sure the ends are thoroughly cleaned. Leaving dirt, rust, or old debris on the pipe ends can lead to poor seals and leaks. Take the extra time to wipe the pipe ends clean with a cloth, and use sandpaper if needed to smooth out any rough edges. Proper cleaning ensures that your new pipe will be properly sealed, and your repair will last.
Overtightening Fittings
Many DIYers tend to overtighten pipe fittings, thinking that the tighter they are, the better the seal. However, overtightening can cause cracks in the fittings or even damage the new pipe. Always tighten the fittings firmly but not excessively, and use a pipe wrench to apply controlled pressure for a secure connection.
Using Incorrect Pipe Type
Using the wrong type of pipe can lead to issues down the road. For example, using a pipe that’s not compatible with your plumbing system or one that isn’t rated for the temperature or pressure it will be exposed to can lead to leaks or damage. Stick to the appropriate pipe type, such as PVC, ABS, or galvanized steel, depending on your needs.
Skipping Leak Testing
After the installation is complete, don’t skip the leak test! Even if the pipe looks secure and everything seems in place, there could still be small leaks that aren’t immediately visible. Turn on the water and let it run for a few minutes while you carefully inspect all the joints and connections. If you spot a leak, tighten the fittings or apply more sealant.
Benefits of Replacing a Galvanized Pipe
Improved Durability
Galvanized pipes deteriorate over time, leading to rust and corrosion. By switching to newer materials like PVC or copper, you’ll improve the durability of your plumbing, ensuring it lasts longer and requires fewer repairs. These modern pipes are rust-resistant and offer a long-term solution.
Reduced Risk of Leaks and Water Damage
Over time, galvanized pipes are more likely to leak, leading to water damage in your home. Replacing them with new, reliable pipes reduces the chances of leaks and costly water damage. This upgrade will help protect your home and prevent expensive repairs in the future.
Better Water Flow
Galvanized pipes can get clogged with rust and mineral build-up, reducing water flow and pressure. By replacing them with modern pipes, you’ll improve water flow and restore consistent water pressure throughout your home. This ensures your faucets, shower, and appliances work efficiently.
Cost-Effectiveness
While replacing your pipes may seem like a significant cost, it’s actually a smart investment. The constant repairs and maintenance of old galvanized pipes can add up. New pipes are more reliable and will save you money by avoiding recurring issues like leaks and blockages.
Increased Property Value
Replacing outdated plumbing can boost your home’s value. Homebuyers appreciate the reliability of a modern plumbing system, which can make your property more attractive to potential buyers. This simple upgrade can lead to a higher sale price and quicker sale.
Best Alternatives to Galvanized Pipes for Home Plumbing
Why PVC Pipes Are Ideal for Plumbing and Drainage Systems
PVC pipes are lightweight, affordable, and resistant to corrosion. They’re a popular choice for drain lines due to their long-lasting nature. The smooth interior of PVC pipes ensures better water flow and fewer blockages, making them a reliable option for residential plumbing.
ABS Pipes for Plumbing Projects
Similar to PVC, ABS pipes are durable and resistant to impact and chemicals. They’re slightly stronger than PVC, making them suitable for both indoor and outdoor installations. ABS pipes are particularly useful in areas with extreme temperatures, providing dependable protection from the elements.
How Copper Pipes Enhance Water Quality in Plumbing
Copper pipes have been a trusted choice for plumbing for decades. They are known for their durability and resistance to corrosion, as well as their ability to handle high water temperatures. Copper pipes provide superior water quality and are often used for both hot and cold-water lines, making them an excellent investment for long-term use.
Why Choose Flexible PEX Tubing for Your Pipes
PEX (cross-linked polyethylene) tubing is highly flexible, making installation faster and easier. PEX is resistant to freezing and bursting, which is especially useful in colder climates. It’s also cost-effective, easy to install, and requires fewer fittings, making it a popular alternative to rigid piping materials.
Comparison of Pipe Materials
When choosing a material for your plumbing, consider factors like durability, cost, installation ease, and long-term performance. PVC and ABS are great budget-friendly options, while copper and PEX offer more durability and longevity. Each material has its strengths, so evaluate based on your specific needs and budget to find the best fit for your plumbing system.
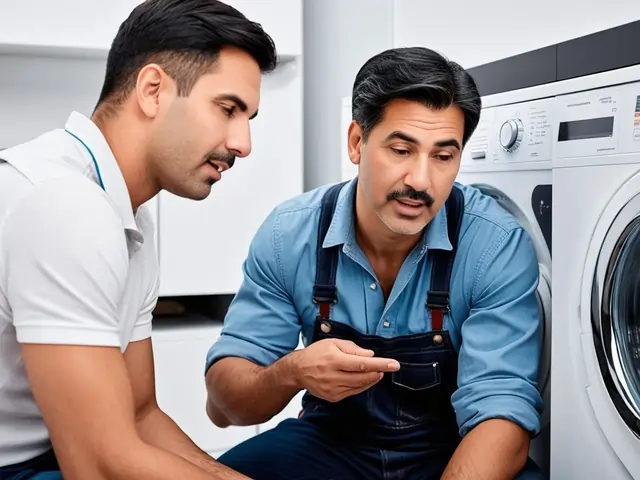
When to Choose DIY vs Professional Help for Plumbing Fixes
When it comes to replacing a galvanized wash machine drain pipe, you may be wondering whether you should take the DIY route or hire a professional plumber. Both options have their advantages and considerations, so here’s a breakdown to help you decide.
DIY (Do-It-Yourself) Approach
If you’re handy with tools and have experience with basic plumbing tasks, replacing the pipe yourself can save you money on labor costs. However, it requires a good understanding of the process, accurate measurements, and the right materials. It’s ideal for someone looking for a challenge and who’s comfortable troubleshooting issues during the replacement process.
Professional Help
Hiring a professional plumber ensures the job is done correctly the first time. Professionals bring their expertise to handle tricky issues, such as pipe alignment, fitting installation, and leak testing. While this option is more expensive, it provides peace of mind and saves time, especially if you’re not familiar with plumbing.
Conclusion: Take Control of Your Plumbing Success!
Replacing a galvanized wash machine drain pipe doesn’t have to be a daunting task. Whether you choose to go the DIY route or opt for professional help, the key is to act with confidence and take the necessary steps to ensure your plumbing is in top condition. With the right tools, preparation, and guidance, you can make this project a success that boosts the efficiency of your home and avoids costly water damage in the future.
Remember, every step you take in replacing your pipe is an investment in your home’s well-being. It’s not just about replacing a pipe—it’s about ensuring better durability, improved water flow, and a safe environment for your family. Take control of your space and make the right decision that suits your needs and skills.
“Success is the sum of small efforts, repeated day in and day out.” – (Robert Collier)
Can you replace washing machine drain pipe?
Yes, you can replace a washing machine drain pipe yourself with basic tools and materials. However, make sure to follow the correct steps for a secure and leak-free installation.
Can you use 1 1/2 inch pipe for a washer drain?
Yes, a 1 1/2 inch pipe is commonly used for a washer drain, as it provides adequate water flow and drainage for most washing machines.
How much to replace a washing machine drain pipe?
Replacing a washing machine drain pipe typically costs between $150 to $300, depending on whether you do it yourself or hire a professional plumber.
How to fix a washer drain pipe?
To fix a washer drain pipe, identify the leak or damage, cut out the damaged section, and replace it with a new pipe, ensuring the connections are tight and leak-free